Adding Stage Configurations in your system helps you track and manage leads efficiently by defining various stages they go through. Here’s a step-by-step guide on how to add stage configurations
Step 1: Navigate to the Lead Stages Page
- Login to your CRM system.
- Go to the CRM System section in the sidebar.
- Click on Leads
Step 2: Access the Add Stage Form
- On the Lead page, locate the Stage Configurations button, typically found on the top right of the page.
- Click on the Stage Configurations button. This will open a form to add a new stage.

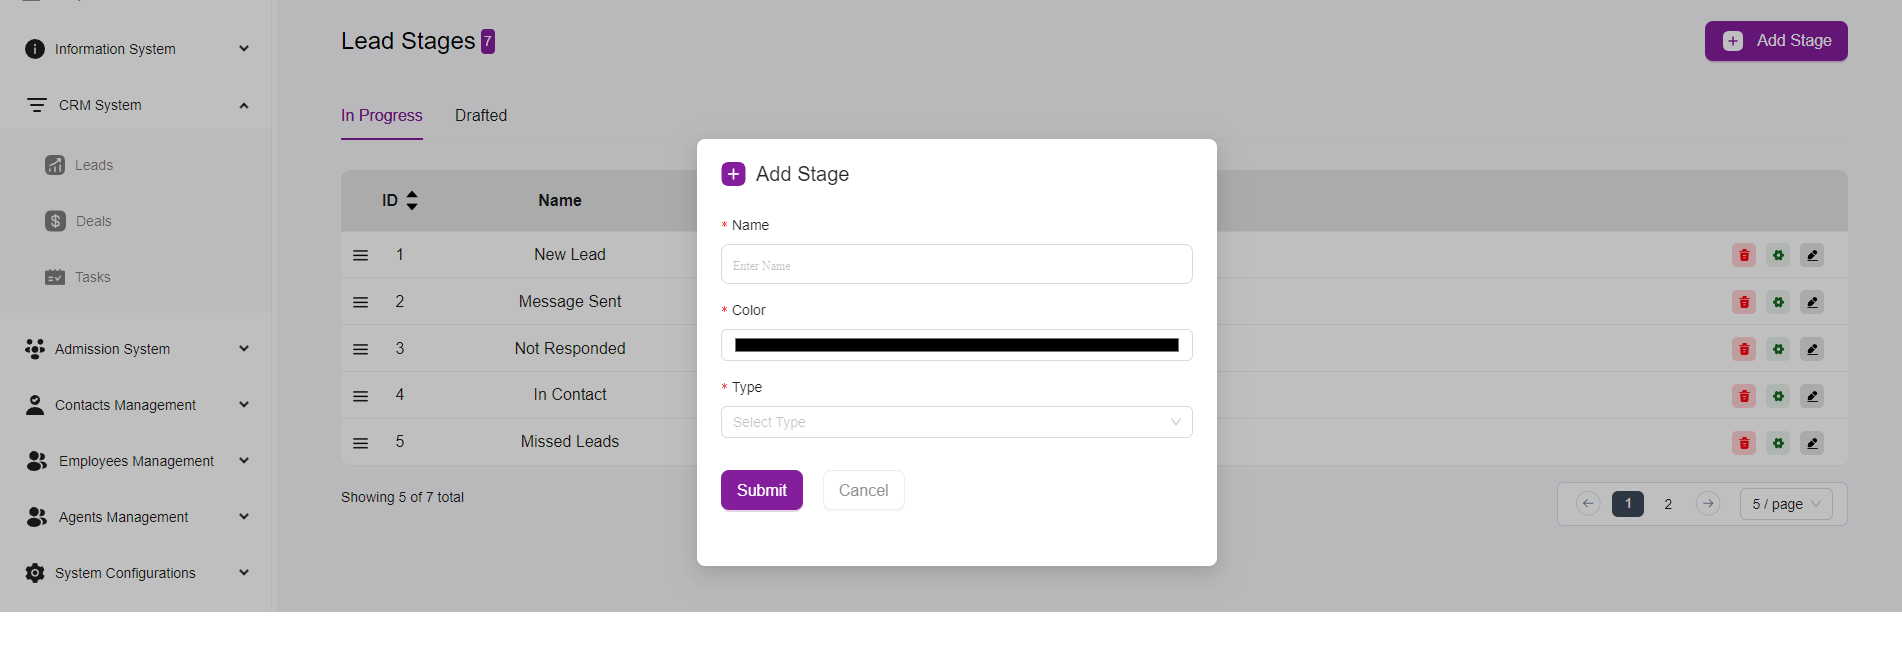
Step 3: Fill Out the Add Stage Form
In the form that appears, you’ll need to provide the following information:- Name:
- Enter the name of the stage. This could be something like “New Lead,” “Message Sent,” “Not Responded,” etc.
- Color:
- Click on the color field to choose a color that will represent this stage. This helps visually distinguish between different stages.
- Type:
- Select the type of stage. Options typically include:
- In Progress: For stages that are currently active or ongoing.
- Drafted: For stages that are being planned or are in draft form.
- Select the type of stage. Options typically include:
Step 4: Save the New Stage
- After filling out all the necessary fields, click on the Save button to add the new stage to your lead stages list.
Additional Actions on Lead Stages Page
- Edit a Stage:
- To edit an existing stage, click on the pencil icon next to the stage you want to modify. This will open the form with the current details of the stage, allowing you to make necessary changes.
- Delete a Stage:
- To delete an existing stage, click on the trash bin icon next to the stage you want to remove. Confirm the deletion when prompted.
- Configure Stage Settings:
- Click on the gear icon next to a stage to configure additional settings if available.