- Navigate to Sub Agents Page:
- Click on the “Agents Management” menu on the left sidebar.
- Select “Sub Agents” from the submenu.
- Open Add Sub Agent Form:
- Click the “+ Add Sub Agent” button located at the top right corner of the page.
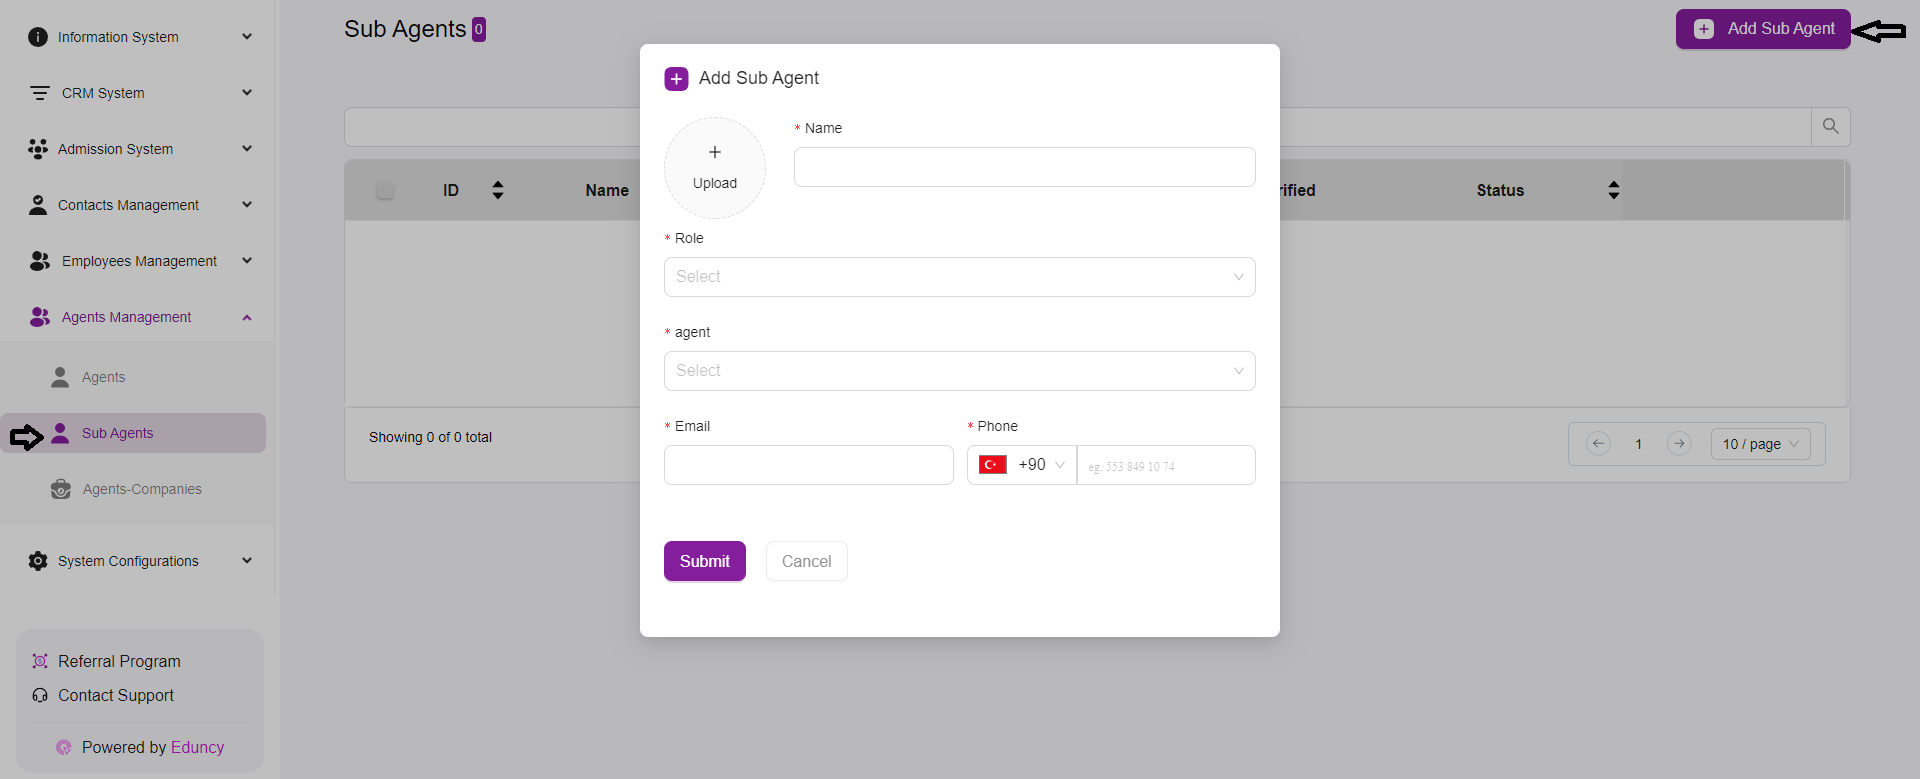
- Fill Out Sub Agent Details:
- Upload Profile Picture: Click on the “Upload” button to add a profile picture for the sub-agent.
- Name: Enter the sub-agent’s name in the provided field.
- Role: Select the role of the sub-agent from the dropdown menu.
- Agent: Choose the agent to whom the sub-agent will be assigned from the dropdown list. This field links the sub-agent to their supervising agent.
- Email: Enter the sub-agent’s email address.
- Phone: Enter the sub-agent’s phone number. The country code can be selected from the dropdown, and the phone number should be entered in the provided field.
- Submit the Form:
- After filling in all the necessary details, click the “Submit” button to save the new sub-agent.
- If you want to cancel the process, click the “Cancel” button.
- Verification Note:
- After submitting the form, the agent will receive an email with a verification link.
- The agent must check their email and click the verification link to complete the registration process and become a verified user in the system.