- Navigate to the Agents Management Section:
- In the main menu on the left, expand the “Agents Management” section.
- Click on “Agents” to open the agents management interface.
- Add a New Agent:
- Click the “Add Agent” button located at the top right corner of the interface.
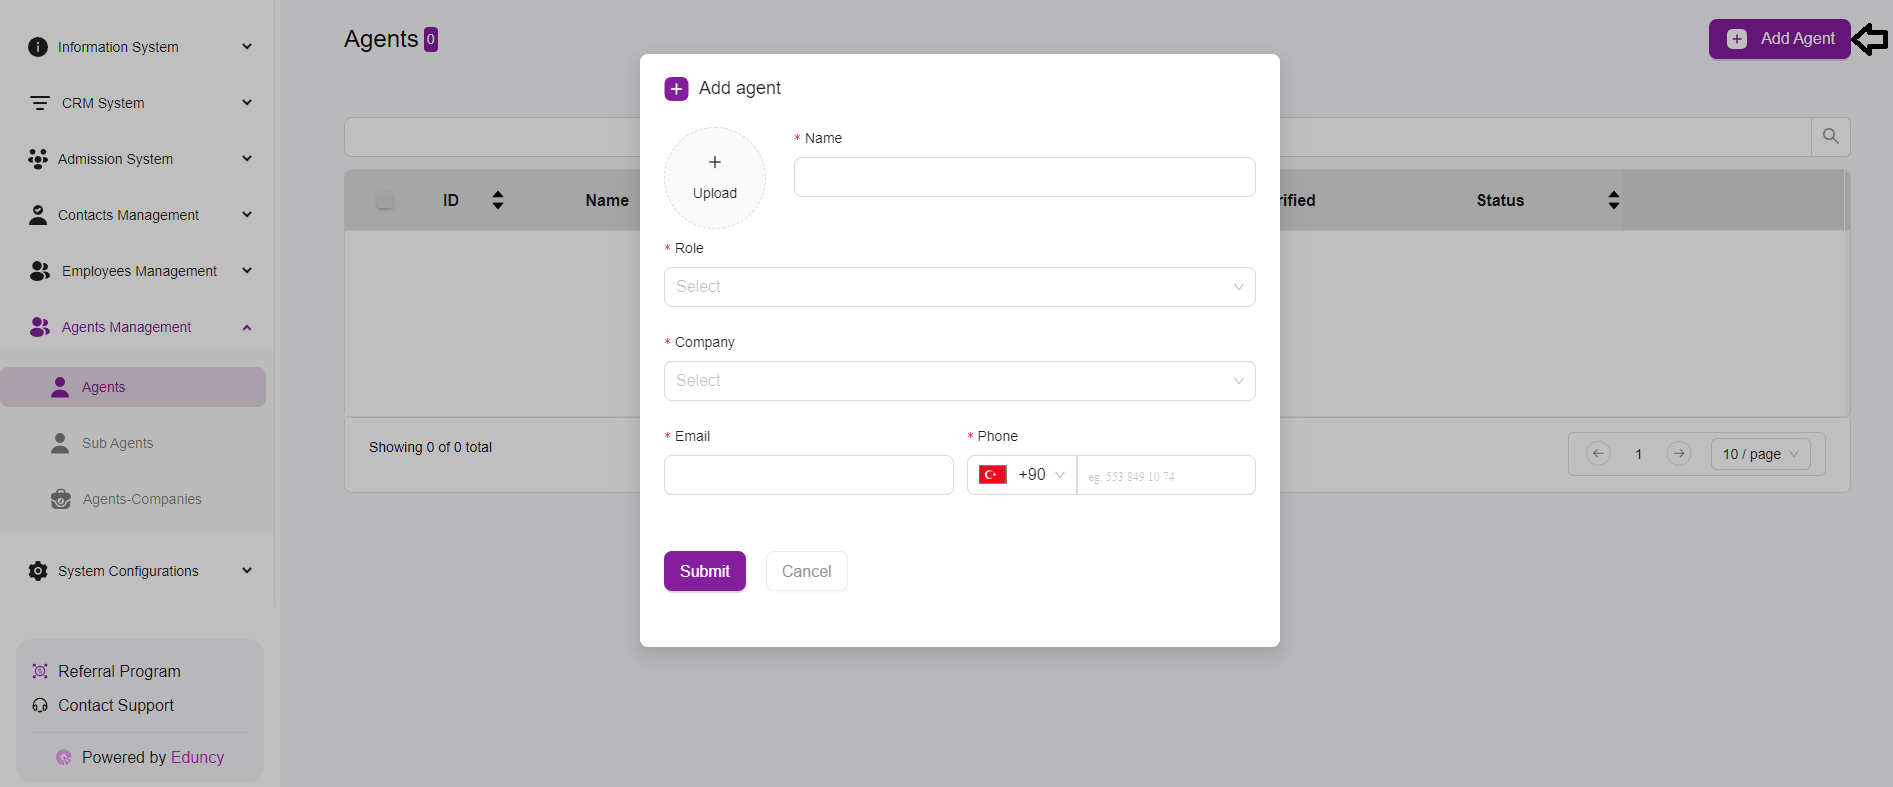
- Fill in the Agent Details:
- A form will appear, allowing you to input the necessary details for the new agent.
- Upload Photo:
- Click on the “Upload” button to add a profile picture for the agent (optional).
- Name:
- Enter the full name of the agent.
- Role:
- Select the role of the agent from the dropdown menu
- Company:
- Select the company the agent is associated with from the dropdown menu. Important Note: You have make an Agent Company first if you don’t see options in the field.
- Email:
- Enter the agent’s email address.
- This is a required field and is crucial for the verification process.
- Phone:
- Enter the agent’s phone number.
- Submit the Form:
- Once all required fields are filled, click the “Submit” button to add the new agent.
- If you change your mind, you can click “Cancel” to close the form without saving any changes.
- Verification Note:
- After submitting the form, the agent will receive an email with a verification link.
- The agent must check their email and click the verification link to complete the registration process and become a verified user in the system.
- Managing Existing Agents:
- The newly added agent will appear in the list along with other agents.
- The list includes columns for ID, Name, Email, Verified Status, and various actions for managing the agent’s details.