From the left sidebar, select “Admission System” and then click on “Students” to open the students management page.
Initiate Adding a Student:
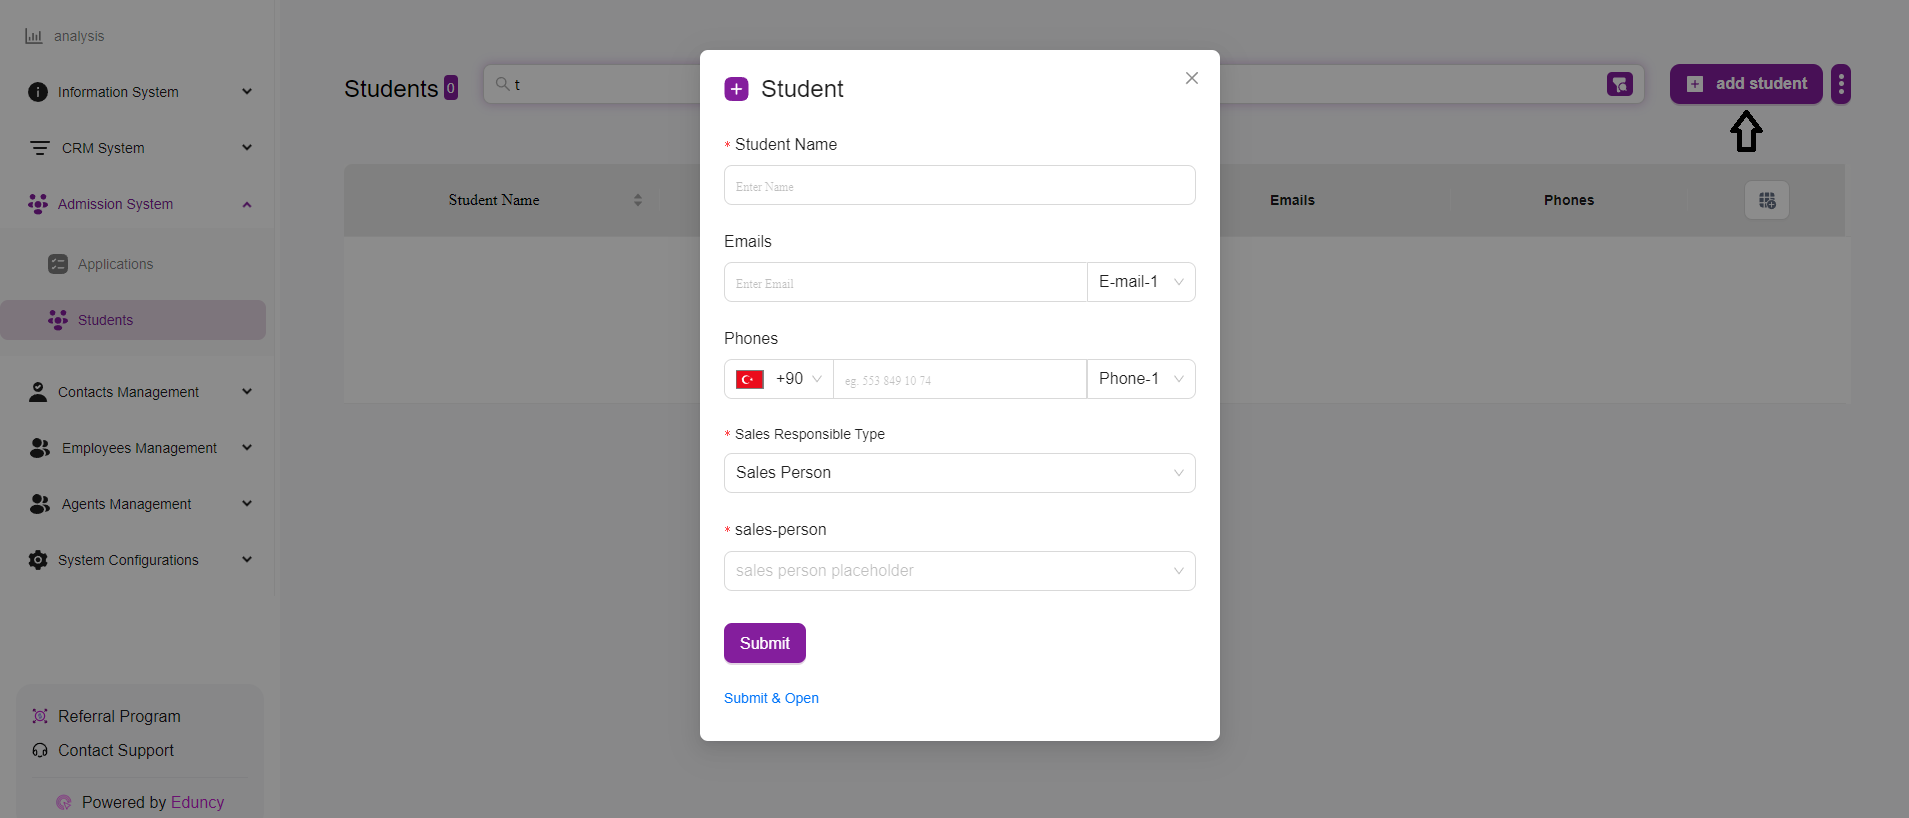
Click on the “+ Add Student” button located at the top right of the students page.
Fill in Student Details:
A form will appear prompting you to enter the student’s details.
Enter Basic Information:
Student Name: Enter the full name of the student.
Emails: Input the student’s email address. You can add multiple emails if necessary by selecting “E-mail-1” or “E-mail-2” from the dropdown menu next to the email field.
Phones: Enter the student’s phone number. Select the appropriate country code from the dropdown menu and input the number. Additional phone numbers can be added by selecting “Phone-1” or “Phone-2” from the dropdown menu.
Assign Sales Responsibility:
Sales Responsible Type: Select the type of sales responsibility from the dropdown menu (e.g., Sales Person, Manager, Agent, etc.).
Sales Person: Input the name or identifier of the sales person responsible for this student.
Submit the Form:
Once all necessary information is filled out, click on the “Submit” button to save the student’s details.
If you need to immediately open the student’s profile after submitting, click on “Submit & Open”.
Tips for Adding a Student
Accuracy: Ensure all entered information is accurate and complete to avoid issues later.
Multiple Contacts: Utilize the multiple email and phone fields if the student has more than one contact method.
Responsibility Assignment: Correctly assign the sales responsible type and sales person to ensure proper tracking and follow-up.
By following these steps, you can efficiently add new students to the Admission System, ensuring their information is properly recorded and managed.
How can we help?
A product for education consultation agencies to streamline their operations and manage leads efficiently.