The “Application Status” management interface allows users to define and manage different stages of the application process. This feature is crucial for tracking the progress of applications and providing applicants with up-to-date information about their status.
Steps to Add an Application Stage:- Access the Application Status Section:
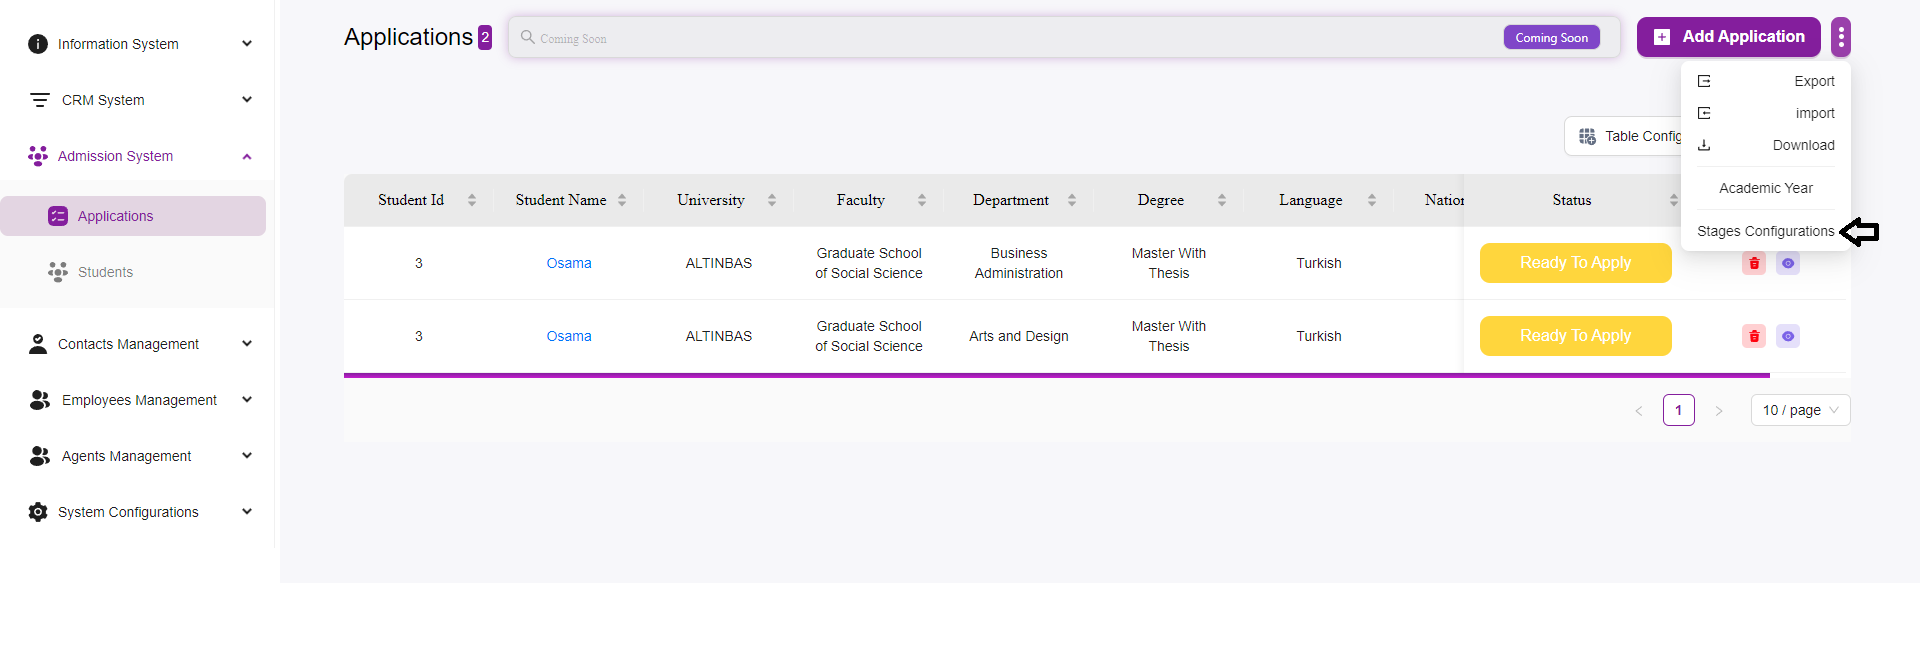
- Navigate to the “Admission System” in the main menu.
- Select “Applications” and then click the three dots, then choose “Stages Configurations”
- Add a New Status:
- Click the “Add Status” button located at the top right corner of the interface.
- Fill in the Status Details:
- A form will appear, allowing you to input the necessary details for the new application stage.
- Status:
- Enter the name of the application status (e.g., “Submitted,” “Under Review,” “Accepted”).
- This is a required field.
- Color:
- Select a color to visually distinguish this status from others.
- Click on the color box to choose a color from the palette.
- This is a required field.
- Label(Optional):
- Optionally, you can select the associated university from a dropdown menu, if applicable.
- This field helps to categorize the status if you manage multiple universities within the system.
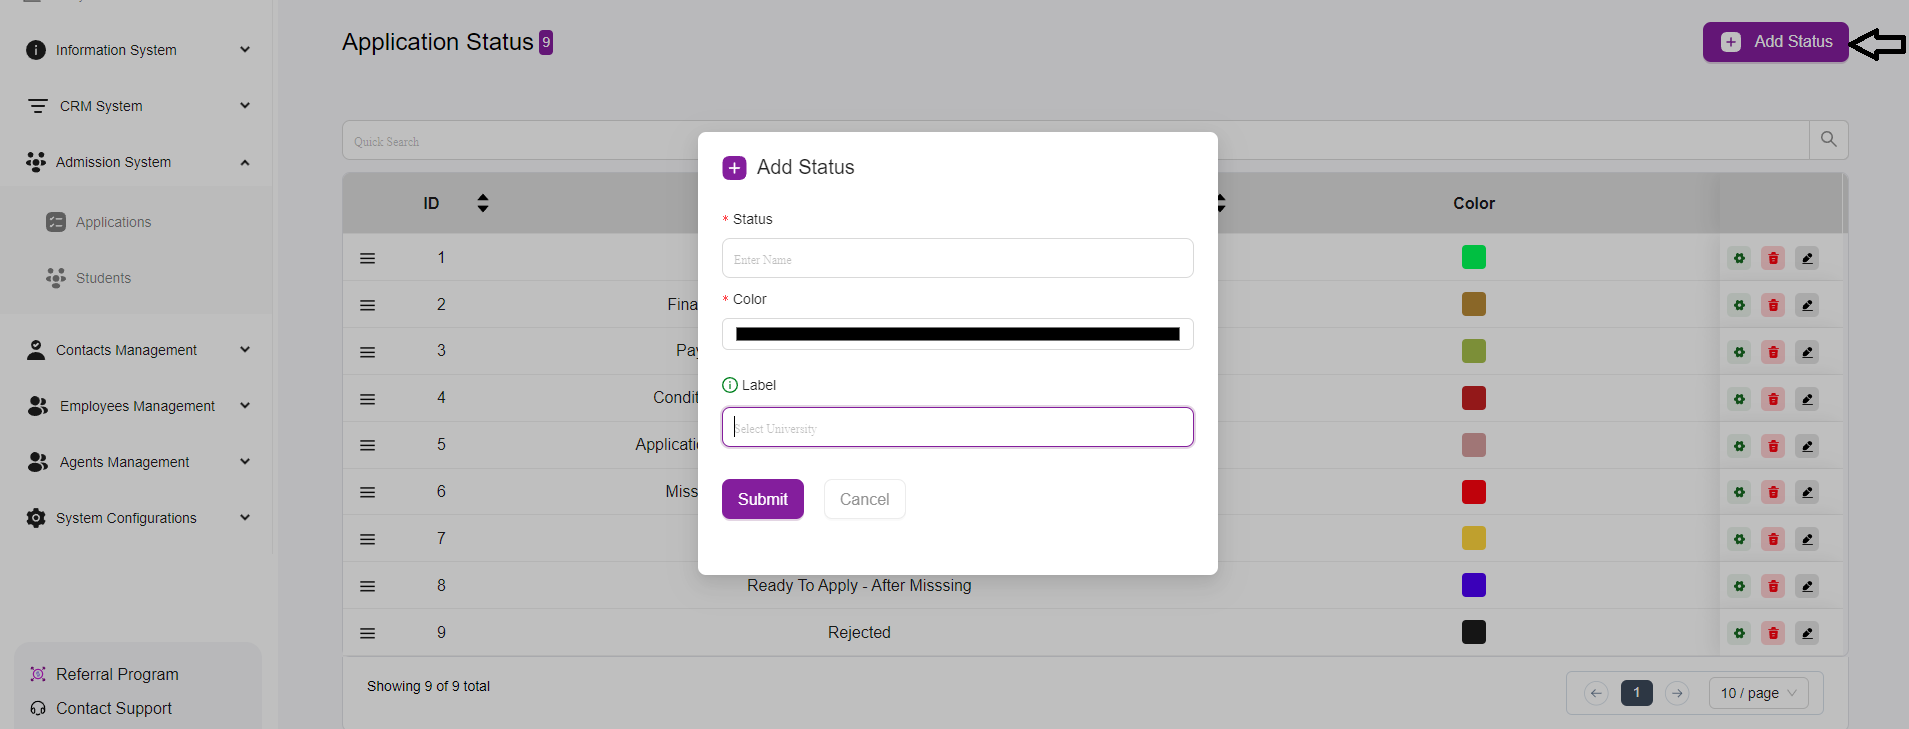
- Submit the Form:
- Once you have filled in the required fields, click the “Submit” button to add the new status to the list.
- If you change your mind, you can click “Cancel” to close the form without saving any changes.
- Managing Existing Statuses:
- After adding, the new status will appear in the list along with other existing statuses.
- Each status has action icons next to it:
- A settings icon (gear) for configuring the status.
- A pencil icon for editing the status.
- A trash can icon for deleting the status.
- Search and Pagination:
- Use the search bar at the top to quickly find a specific status.
- Navigate through the pages using the pagination controls at the bottom if you have many statuses.